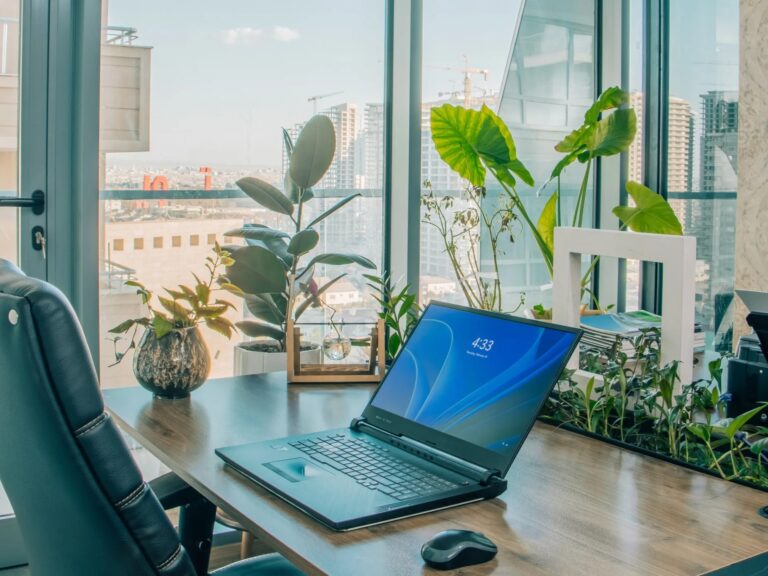
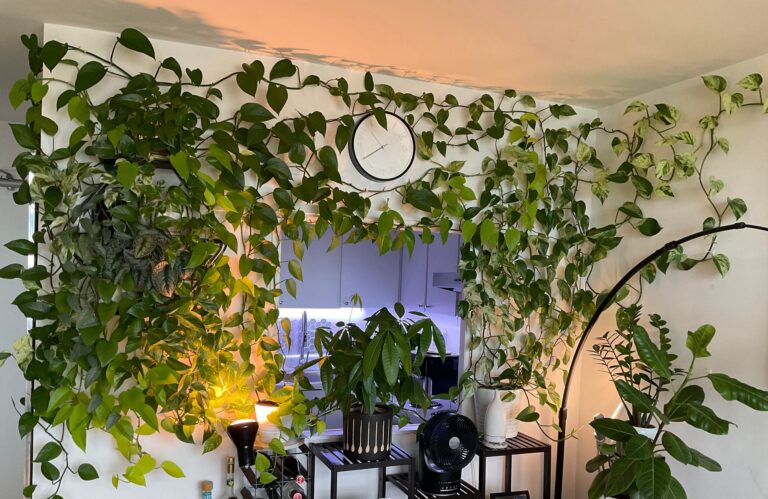
Philodendron Propagation: 5 Proven Methods with 95% Success Rate
And let the power of propagation techniques that consistently achieve consistent results of propagation lead you to a philodendron and thrive on your one philodendron and make it into one collection you like to grow. When introducing a loved heartleaf variety and the pretty pink princess, these five proven methods will make your plant propagation easy to carry out — These scientifically sound procedures will change what this year’s best ways to breed your prized heartsangelos look like.
Understanding the Fundamentals of Philodendron Propagation
This knowledge of the botanical science of philodendron propagation will assist in the design of your initial techniques of cutting so that every single blade of philodendron wood you use is one that has the greatest likelihood of success. Philodendrons, with their nodes, are incredibly regenerative – they are the area of tissue that is designed to allow stem cells (where the roots are) to sprout under any circumstances.
The node is a critical point for spreading a philodendron, the meristematic tissue is produced which, when supplied with appropriate moisture, temperature and other hormonal input, can grow adventitious roots. In a node, dormant root primordia, essentially pre-formed root structures waiting for activation cues, are formed, appearing in each node.
This biological benefit helps explain why philodendron propagation has much greater success rates compared to no such robust node development in plants.
Environmental Factors Impact on Propagation Success
Studies show that keeping the conditions of temperatures of 75-80°F for the rooting zone help in the initiation of roots 40-60% faster than for the room temperature. In a like manner, when humidity is above 70%, transpiration is prevented while promoting cellular division essential for rooting.
Method 1: Water Propagation – The Visual Approach
The most commonly used method for philodendron enthusiasts is still water propagation–it has a unique advantage, for example monitoring the root’s development in real-time. This visibility allows Propagators to notice problems early enough and switch conditions before cuttings are failed.
First, pick healthy stems consisting of 2-3 nodes: one size cuts length is 4-6 inches minimum. Cleanly cut with sterilized pruning shears at 45-degree angles just below nodes, giving a lot of surface area for root emergence and preventing water from pooling on cut surfaces.
To avoid submersion, lower leaves must be removed as decaying foliage allows bacteria to get into the roots, which can hurt the roots. Keep made cuttings in clear glass vessels containing room temperature water, keeping all nodes submerged and foliage above water level.
Instantly place containers in bright, indirect light for 4-6 hours a day—direct sunlight encourages growing algae and temperature changes can be detrimental to rooting. Within 7-14 days, success marks develop small white tips of root from the nodes.
An initial root length of 2-3mm, translucent and gradually lengthening and developing root hairs over time. Research shows optimal transfer timing is when roots have reached a length of 1-2 inches; this will provide an adequate root mass for successful soil transfer.
Replace completely and every 7-10 days to maintain water quality; prevent bacteria accumulation and ensure oxygen saturation. In studies performed by researchers, those cuttings kept in oxygen-rich water became roots 25% faster than cuttings kept in stagnant water, with far fewer rot incidents.
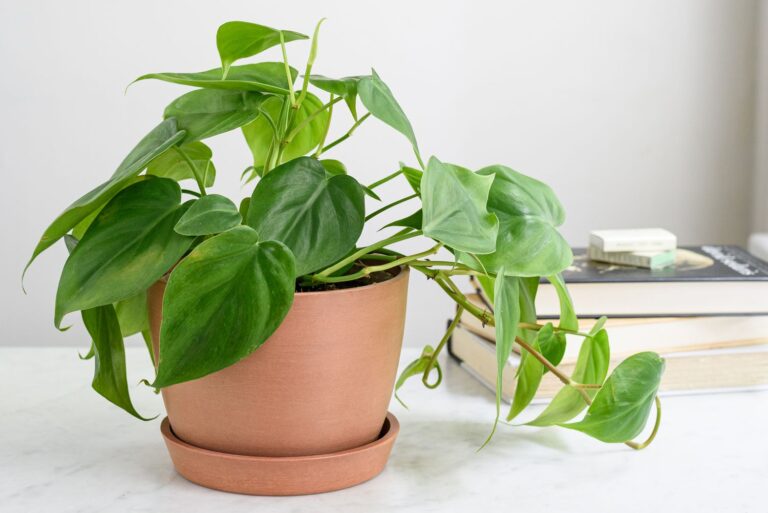
Method 2: Soil Propagation — The Traditional Approach
Soil propagation has many benefits compared to water methods such as less transplant shock due to instant establishment to growing medium. With a few exceptions, professional growers routinely choose this method due to it being more efficient and need less care once established.
Prepare a specialized propagation medium using equal parts potting soil and perlite, creating optimal drainage while maintaining adequate moisture retention. The addition of perlite increases oxygen availability to developing roots—critical since oxygen deficiency represents the primary cause of propagation failure in soil-based systems.
Dip cut stem ends in rooting hormone powder containing 0.1-0.3% indolebutyric acid (IBA), a synthetic auxin that stimulates root initiation. Studies prove hormone application to cuttings root 30-40% faster than untreated cuttings and show a large amount of root mass development.
Use powder to the bottom 1/2 inch on stem, making sure the area around node is well covered. Plant cuttings so nodes rest 1/2 inch below soil surface, gently firming medium around the top of stems to remove air pockets.
Soil moisture should be on the 60-70% of field capacity side (damp but not too damp) with no waterlogging. The error of overwatering is the most frequent mistake, which results in a lack of oxygen causing the plants to rot rather than the roots to develop.
Check on your child’s progress after 3-4 weeks by gently pulling up cuttings – resistance = root growth. If conditions are right, new growth will emerge during some 4-6 weeks (but varies by choice and type of conditions).
Method 3: Sphagnum Moss Propagation – The Professional Secret
Growth with your own speciality or when a hard variety must be grown better is what helps them to survive. This technique uses the moisture retention benefits of water propagation and the soil techniques’ reduced transplant shock advantages.
When doing so, choose premium long-fiber sphagnum moss that isn’t compressed or finely-ground and won’t pack too closely. Rehydrate moss for 30 minutes in distilled water, and squeeze off any excess moisture until the moss feels dampened but not dripping — like a wrung-out sponge.
Keep This Mins moisture level of constantly hydrated is the key for air space for root to exist. In moss bundles wrapped, prepare stem segments of 1-2 nodes, where there is full coverage of topography, but leaves are kept out.
Plastic or rubber bands can be used to secure bundles and build mini-greenhouses with ambient humidity at up to 90% (which is ideal for rapid root roots). Put mosses in clear tanks with drainage holes placed in bright, indirect light.
Keep a read on moisture levels every three to four days, mist moss if surface looks dry. Research has found that sphagnum propagation can give results of 95% success if maintained properly in conditions and has much increased success rate.
This is a substantial improvement over methods limited solely to water or soil treatments. Root development usually begins between 10-14 days and large fibrous root systems are present by day 21. The fibrous aspects of sphagnum roots can easily grow on different growing media, and consequently can be applied to transplant roots, virtually removing the shock that is often encountered in other procedures.
Method 4: Bare Stem Cuttings – Maximum Multiplication
This more sophisticated method maximizes plant yield from only one stem, ideal for rare or expensive varieties. An individual node segment can easily transform into an independent plant, which is why this method is extremely efficient for speedy proliferation.
Divide each stem segment into 1-2 inch sections and each will have at least one visible node with the “eye” or growth point facing to the top. For plants, the energy spent on leaf removal can be redirected towards root development when you remove all foliage, as removal causes hormonal changes when removing foliage, instead of using the energy to maintain existing foliage.
Preparation of propagation trays with equal proportions of perlite and vermiculite for drainage and moisture retention. This combination is great in that it allows very good aeration and keeps the moisture levels the same which will be essential for the stem segment survival.
Drain well and let retain for 30 minutes before planting. Insert stem segments horizontally, with nodes positioned 1/4 inch below surface level. Separate segments 2 inches apart to avoid competition by rooting and provide proper air circulation.
Use clear plastic domes or plastic wrap to cover trays and keep humidity higher than 80% with a limited amount of light penetration. This process takes patience; it takes 4-6 weeks for growth to be visible.
Nevertheless, each of them will, when successful, develop its own root systems independently through each stem segment, new growth points as yet untouched in the stem and a single vine section, will yield between 5 and 10 new plants.
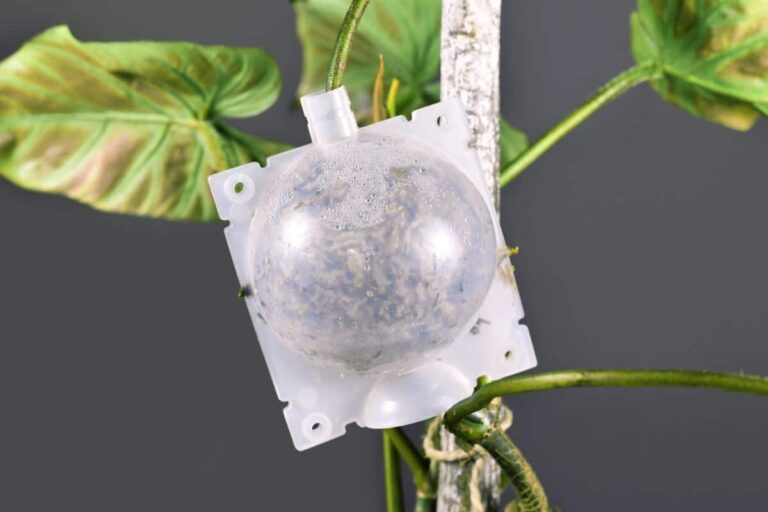
Method 5: Air Layering — Propagation Without Cutting
The most advanced philodendron propagation technique is air layering; roots develop and stems hold onto the parent plant. This method removes the stress response when cuttings are pulled away from the main plant with nearly 100% success rates.
Choose growing healthy stems, usually 1/4 to 1/2 inch along their length. You are to look for sections (where there are 2-3 nodes) 4-6 inches apart from selected parts. Cut them a 1/4 inch short, upward-angled, through the stem bark, about one-third of the way through the stem diameter.
This cut breaks the phloem layer, and moves energy out toward developing roots through that area to that root region. Pour root hormone powder into the injured area, focusing on the cut and the surrounding bark.
Wrap the treated region with wet sphagnum moss, resulting in a 3-4 inch-size ball. Wrap moss in plastic, completely sealing to keep moist and light penetration inside. Weekly moisture testing, water injected with tiny holes if moss looks dry.
Usually within 4 to 6 weeks, root development is visible through the plastic, with root systems wide in size by week 8. Once roots have penetrated through the moss ball completely, cut stem below the root section and pot in the right growing medium.
Optimizing Environmental Conditions for Maximum Success
The choice between 60% and 95% propagation success is the establishment of favorable environmental conditions. If a propagator is aware of what they absolutely need for temperature, humidity, light, and air circulation, their performance will be professional standard.
Temperature control is the most vital one, and root zone temperatures ranging from 75°F to 80°F accelerate cell division and root establishment. Employ heat mats equipped with thermostatic controls to ensure stable temperature levels, with greater temperatures of >5°F greatly impeding success.
Air temperature keeps a little cooler (70-75°F) in order to minimize bacterial and fungal growth while allowing for photosynthesis. Humidity levels have to be carefully balanced – above 70% prevents high transpiration, which may desiccate cuttings, and excessive humidity above 95% creates conditions favoring fungal pathogens.
Use humid domes or plastic bags with holes to keep the level right and keep them open daily for 10-15 minutes for air refreshing and to prevent stagnant air (or water in them). Light requirements consist of 4-6 hours of bright, indirect light every day.
Direct sunlight is the cause of excessive heat build up and also causes growth of algae in the water and less light is the cause of the growth being weak and elongated and the less energy reserve is the key to the establishment success. LED growth lights spaced 12–18 inches above propagating pots help keep the lights warm day (even if the season changes).
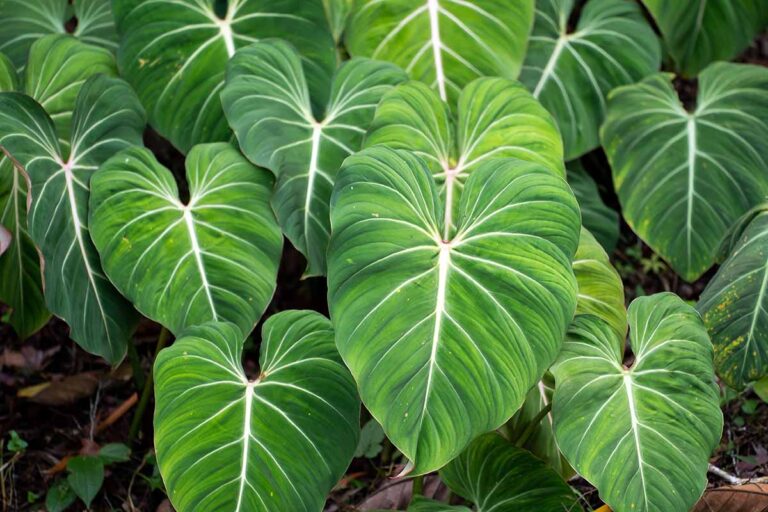
Node Detection and Selecting Optimal Cutting Sites
The correct detection of nodes are the cornerstone of philodendron propagation, as this specialized tissue bears the structural components required for root formation. Since node anatomy is crucial to a propagator to be able to decide on the best position of the cutting place and to maximize the chances of successfully cutting each node.
Nodes form as swollen patches along stems from developing leaves and usually they have tiny bumps or aerial root primordia. This demonstrates active meristematic tissue with adventitious roots, under adequate conditions.
The internode area between the nodes is vascular but has no regenerative ability; cuttings must have at least one complete node for effective spreading. Step back, and check the stalks closely for node growth trends, as node growth density depends on growth variation and growing conditions.
Usually, heartleaf philodendrons contain 2-4 inch nodes along their vining stems and self-heading, more widespread nodes that take much longer to cut. Set nodes 1/4 inches away with cuts: Prepare stem section; include all nodes without leftover stem tissue that could fall into decay.
Cut cleanly at 45 degree angles to make use of the most surface area and avoid water accretions on the cutting surface.
Advanced Strategies for Increasing Success Rates
To accomplish consistently high percentage of successful propagation, it is necessary to use effective techniques to tackle the major issues. Studies have shown that using a specific protocol can propel success rates from 60-70% for average industry products to professional levels above 90% in the best practices.
Sterilizing the material is the most overlooked yet key component of successful propagation. Sterilize cutting tools between each cut with 70% isopropyl alcohol, to minimize disease transmission to and from the target cut, which has the potential to weaken entire batches of cuttings.
And for the same set, use new containers with new propagation media, since reused materials carry pathogens that can contribute to cuts. The timing of propagation efforts to coincide with active growing periods improves results tremendously.
Spring through early summer is the best time so native hormones will promote fast root development. Do not introduce the seeds for winter except when extra light and heat for better harvesting are provided; when it is dark and there is reduced light intensity and cooler temperatures, rooting times are extended drastically.
Adopt progressive acclimatization techniques for the transfer of placed cuttings to their usual cultivation. Slowly decrease the humidity throughout the next 7-10 days, the plants will develop cuticle protectors and no matter how thin their cutters are to prevent desiccation.
Unplanned or extremely abrupt changes in the soil frequently trigger stress reactions, and most times the result is either leaf loss or loss of plant viability.
Mastering the Soil Transition Process
Transitioning well propagated cuttings from root environment back to the common growing medium is a critical stage in a successful propagation. By being aware of the physiological alterations occurring at this transition point, propagators can keep stress low, keeping the plant growing.
Waterborne cuttings gain aquatic root adapted (the roots have thinner cell walls and less protective tissues than those in soil roots). The shift necessitates slow acclimatizing to avoid desiccation and damage to the extremity tissue.
Introduce gentle amounts of soil into the growing water for 3 to 5 days, which will improve roots ability to accommodate surface contact with an increasing amount of solid particles. Choose suitable potting mediums for new-rooted cuttings and avoid heavy soils that retain excessive moisture.
Good quality potting mixture with 25% perlite results in the most efficient drainage with the best moisture to retain. Inoculations with mycorrhizal fungi can also promote establishment by 20-30% as they are beneficial to nutrient utilization and diseases.
Keep the humidity high in the beginning transition stage by putting plastic domes or bags to mold the microenvironments in order to continue root establishment. The process is to gradually introduce ventilation over 10 to 14 days to allow space for plants to adapt to the plant life needs to be able to grow as normal.
Troubleshooting Common Propagation Failures
And learning about common propagation failures helps propagators find issues early and take corrective action before they lose precious cuttings. The majority of failures can be avoided if environmental conditions, disease management or preparation or technical issues are preventable.
Stem Rot Issues
Stem rot is the most common failure mode, which often shows up as blackened mushy tissue at the cutting base. Excessive moisture, bad drainage or bacterial contamination can cause this condition. Preventing this condition is done through proper moisture maintenance, sterile media use, and proper air circulation.
Use new sterile propagation medium to reduce early stage rot by recutting stems above offending areas.
Yellowing and Leaf Drop
Yellowing and drop of the leaves usually signify too much moisture or not enough light. Yellowing typically starts on lower leaves, advancing into ascendancy when conditions break out. Correct by adjusting watering frequency and improving drainage, and exposure to adequate but not excessive light.
Remove affected leaves quickly or risk rot that will travel to healthy tissue.
Slow or Failed Root Development
Slow or unsuccessful root growth is commonly caused by cold temperatures and by an incorrect degree of hormone production. Keep the temperatures of root zone in the 75-80°F zone and rooting hormone in cuttings without any root creation at 3-4 weeks by applying root hormone.
In some cases, recutting stems with freshness of tissue might revive new root formation by exposing them to fresh tissue.
Advanced Professional Methods and Techniques
Professional growers use techniques of their own, resulting in improved propagation efficiency and success rates. Such methods although require more tools or knowledge, yield much better results on serious propagators or commercial systems.
Tissue Culture Propagation
Tissue culture propagation is the new paradigm of philodendron multiplication that allows for the production of hundreds of the same species from small tissue. It involves sterile laboratory conditions and special media formulations, and reaches a near 100% success rate without any potential for disease transmission.
Bottom Heat Systems
Bottom heat systems, which can control the bottom heat temperature with precision, deliver constant warming of every root zone without alteration of normal atmosphere. Expert units keep temperatures within 1°F of target temperature, maximizing conditions for rapid root growth and minimizing pathogen growth that takes place at greater temperatures.
Humidity-Controlled Propagation Chambers
Humidity-controlled propagation chambers that have an automated system of ventilation, maintain optimal environment without frequent manual operation. These units cycle an automatically turned on ventilation fans based on humidity sensors, which maintain 75–85% relative humidity, thus preventing condensation buildup that promotes fungal growth.
Specialized LED Propagation Lighting
By doing so, they could potentially increase root development 15-20% faster than general fluorescent lighting using LED propagation lights with dedicated spectrum modulation. Dominance of red spectrum (660-670 nm) helps initiate roots, and minimal blue light sustains cutting viability and does not allow excessive top growth during the rooting phase.
Key Sources:
How to Propagate Philodendron – Better Homes & Gardens
Philodendron Propagation Guide – The Spruce
Pink Princess Propagation Methods – Ohio Tropics
Plant Addicts Philodendron Propagation Guide
Philodendron Brasil Propagation – Joy Us Garden
How to Propagate Houseplants by Stem Cuttings – Iowa State University Extension